
Your Guide to All Things Barbeculture

1) KNOW YOUR ZONES
Hot? Warm? Every grill has its own personality and may be a little temperamental at times. Ideally, you can control your grill’s moods with a HOT zone and a WARM zone. Zones come in handy when you’re cooking multiple types of meats and/or different cuts and thicknesses.
Check these out for grill recommendations:
2) REPLACE YOUR METAL OR WOODEN SKEWERS WITH A SPRIG OF ROSEMARY
Super simple and adds a delicious richness to whatever you’re grilling. The leaves and ends will get charred, giving your ’Q a deeper, smokier flavor. This is the kind of trick that makes Bobby Flay a television star and the rest of us wondering why didn’t I think of that? Well, now you have.

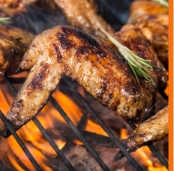
3) FLARE UPS!
Yikes – no one agrees on anything about flare ups! Spray Water (no!), Spray Vinegar (huh?). What we do is have a fresh platter always near the BBQ—if and when a flare up happens, just take the food off the grill, close the lid and let the flames calm down. Another option is “the stack”—move everything to the top rack on a non-flaming area—make a “pancake” stack of the steaks or chops or chicken. This does not work on most fish (too soft) or veggies (too uneven). “The stack” also works great to help control different levels of cooking for steak (rare, medium rare, etc.). If you use ANY marinade that has oil, watch out for an immediate flare up when you put the food on the grill!
Wanna dive a little deeper? Check out these great sites.
4) SMOKE SOME HERBS ON THE GRILL (NO, NOT THAT HERB!)
Think Rosemary. Sage. Fennel. Throw a sprig or two or five on the grill before you close the lid. It will add a complex, smoky quality that will amaze your guests and bring you fame and fortune (or at least admiring glances from non-BBQ’ers).
5) TAKE IT OFF A LITTLE EARLY
And let it rest. Remember, meat continues to cook even when it’s no longer over a heat source.
Check out these great sites for other recommendations:
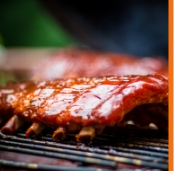
6) THICKER IS BETTER (WELL, SOMETIMES!)
One of the more common grilling mistakes is over-cooking—especially steaks. Which is why thicker is better. Once you master YOUR grilling techniques, thick cuts of steak and chops can be a joy! These can be expensive, though, and not for the first time BBQ’er! Ask for double cuts at the meat/butcher counter. You’ll be glad you did!
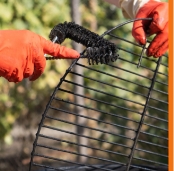
7) NEVER CLEAN YOUR GRILL WITH SOAP AND WATER
Instead, invest in a stiff wire brush. Maybe a couple. Brush AFTER you’re done grilling (be careful while its super-hot!) and BEFORE your next session. Even better, cut a big onion in half and rub it over the grates for a natural anti-bacterial. (Do this after the grill has cooled down all the way!)
Wanna get lost in the world of grill accessories? Check the links below.
8) PUT IT ON AND LEAVE IT ALONE
It’s cooking. It doesn’t need to be turned just yet. Want a great sear? Beautiful grill marks? All you have to do is leave it alone. The grill will do the rest.
Check these out for other recommendations and mistakes to avoid:

Preheat your grill for at least 15-20 minutes. If you fire up the grill (charcoal or gas) and put your food on a cold grill right away, you will not get a “sear” since the temperature will be uneven. The sooner you start cooking, the lower your cooking temperature will be. The longer you wait, the higher your cooking temperature will be.
Cooking straight from the fridge can lead to charred exteriors and underdone, cold, or raw interiors. Allow your meat to come to indoor room temperature (68-78 degrees) for 20 to 30 minutes before putting it on the grill. Remember: less food, less time to room temperature; more food, more time to room temperature. We recommend a maximum of one (1) hour at room temperature.
See the U.S. Government’s website for their guidelines @ usda.gov.
Enjoy the process of grilling and learning to barbecue! We’ve all got that friend who everyone says, “They barbecue like a pro!” They learned how to ’Q and so can you! Sometimes mistakes happen—a steak is under-done (put it back on the grill!) or the chicken is over-done. One time we charred the outside skin on the chicken—the inside was great though. So, we doubled down, got the BBQ sauce out, dunked the charred chicken in it, and put it back on the grill. Our guests never knew the difference.
We say “Just Add Water.” But try all kinds of liquids! Beer, wine, juice, cola—the possibilities are endless. The key is to use liquid that will dissolve the Memphis Marinades™ powder and activate the tenderizing ingredients. You can add olive oil (or other oils), but oil by itself will not create the marinade you need and want. Do not use only a citrus juice (orange, lemon, lime, etc.), as it will be too strong when mixed with Memphis Marinades.
For an extra-added punch, add an ounce of bourbon, rum, or tequila to the marinade mix. The alcohol will burn off (so, no drunken chicken or sauced-up steak) and may cause your food to flame up on the grill. So, be careful!


Step 1:
Mix 2 oz. Memphis Marinades dry powder and 8 oz. water or your preferred liquid in the Quick Q base. Stir until powder is dissolved. (It’s ok if there are a few clumps).
Step 2:
Put 3-5 lbs. of chicken, beef, pork, fish, or vegetables into the Quick Q, leaving approximately 1″ of space between the food and the lid.
Step 3:
Place the lid onto the Quick Q base and close the four latches.
Step 4:
Lightly shake and tumble three times to mix food and the marinade mixture.
Step 5:
Fit the air pump onto the red spout on the lid and pull the plunger up to remove air from the box. Repeat 8-10 times until you get a good seal. The resistance will increase as you remove air. Don’t over-pump, which could make the latches too tight/difficult to remove and could damage the container/latches when opening.
Step 6:
Set the Quick Q on a counter for 30 minutes at indoor room temperature (68-78 degrees).
Step 7:
When you’re ready to grill, simply press the center of the red vacuum seal on the lid to release the vacuum pressure. Unlock the latches and remove the lid. If the lid is hard to remove, press the seal again to release the pressure. If the lid sticks, gently pry from base—do not pull on the latches—and the lid will come off. (It may take several attempts)
Step 8:
Remove your marinated food and discard remaining marinade. Do not use as a tableside dipping sauce as the marinade may contain residue from the raw food you just marinated. For more safety tips about raw food, visit FoodSafety.gov.
To really get your creative juices flowing, simply add a few of your favorite spices or flavorings and make your next date with the grill a delicious experiment!


Papa Peabody’s “DeLuxe Garlicky” Chicken—No Ducks in this Recipe!
Ingredients
• 3 to 5 lbs. chicken (approximately 6-10 pieces, exact number depends on if it’s breasts, thighs, legs, or wings and if it’s bone-in/boneless or skin-on/skinless)
• 2 oz. Memphis Marinades Chicken Dry Powder
• 8 ounces (1 cup) water or white wine
• 2 tablespoons olive oil (see ‘Q Basics about flare ups)
• 1 tablespoon vinegar (white, apple cider, or rice wine)
• 1 tablespoon lemon juice
• 12 garlic cloves = 12 teaspoons = 4 tablespoons = 2 ounces (oz.)
As a convenient alternative, we recommend Gourmet Garden™ Garlic Stir-in Paste. Use 1/2 of their 4 oz. tube.

Where’s the Beef? It’s on Beale Street!
Ingredients
• 3 to 5 lbs. (16 oz.) steaks or 7 to 10 8 oz. steaks (bone-in or boneless)
• 2 oz. Memphis Marinades Beef Powder
• 8 ounces (1 cup) water or red wine
• 2 tablespoons olive oil (see ‘Q Basics about flare ups)
• 1 tablespoon vinegar (balsamic or red wine)
• 6 garlic cloves = 6 teaspoons = 2 tablespoons = 1 ounce (oz). If you’re using Gourmet Garden Garlic Stir-in Paste, use 1/4 of their 4 oz tube.
• Optional: Add 1 tablespoon ground cumin
• Optional: Add 1 teaspoon cayenne pepper